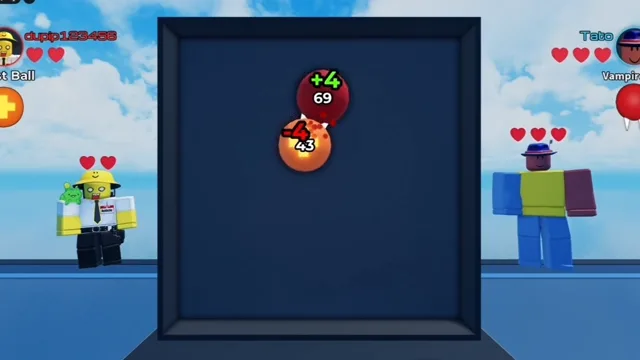
| Shackles Ball Official EN Name: Shackles Ball | Tier S | Mythic | Arena Trap / Persistent Zone Low Counter Exposure | 9.6 / 10 | 1v1 / 2v2 | Unknown (Unconfirmed) | Deploys arena traps that root enemy balls in place and inflict heavy burst damage on connection. Why it ranks here: Dominates fast-moving and melee-scaling balls by locking their trajectory and denying wall bounces. How to counter: Use long-range projectile or turret balls (like Glass or Cannon) that deal damage without crossing trap clusters. |
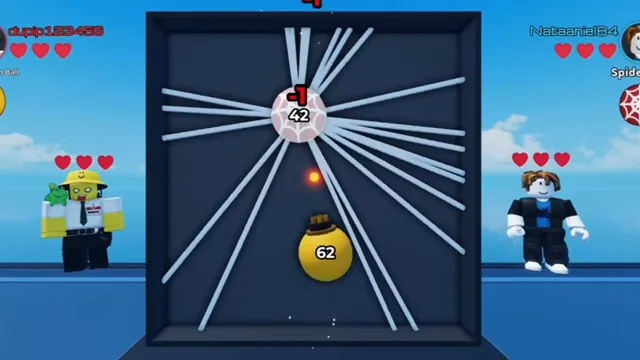
| Spider Ball Official EN Name: Spider Ball | Tier S | Rare | Arena Trap / Persistent Zone Low Counter Exposure | 9.6 / 10 | 1v1 / 2v2 | Unknown (Unconfirmed) | Weaves damaging spider webs whenever it strikes arena walls, progressively covering the entire floor. Why it ranks here: Reported counter to Hook Ball and melee rushers. The guide describes a starter unlock; current Gacha pool membership has not been verified. How to counter: Use ranged turret/beam balls or Vampire Ball sustain before the web network covers all bounce angles. |
| Laser Ball Official EN Name: Laser Ball | Tier S | Epic | Arena Trap / Persistent Zone Low Counter Exposure | 9.5 / 10 | 1v1 / 2v2 | Unknown (Unconfirmed) | Leaves persistent laser beams across the arena after hitting walls, damaging any enemy ball that crosses them. Why it ranks here: Turns the entire square arena into a hazard grid within seconds; punishes high-speed bouncing enemies. How to counter: Vampire Ball can heal through chip damage, or burst balls can try to end the round before lasers stack. |
| Vampire Ball Official EN Name: Vampire Ball | Tier S | Rare | HP Drain / Sustain Low Counter Exposure | 9.5 / 10 | 1v1 | Unknown (Unconfirmed) | Latches onto an enemy ball to drain its HP while simultaneously healing your own ball. Why it ranks here: Accessible Rare rarity with S-tier 1v1 dominance; lifesteal swings net HP differential twice as fast. How to counter: Knockback and stun balls (Snake, Electric, Bomb) break its latch attachment and interrupt the drain. |
| Conductor Ball Official EN Name: Conductor Ball | Tier S | Epic | Hit Scaling / Speed Tempo Low Counter Exposure | 9.4 / 10 | 1v1 / 2v2 | Unknown (Unconfirmed) | Chains high-uptime electric conduction across arena contacts for top-tier sustained DPS. Why it ranks here: Extremely reliable in both short and medium rounds; does not require lucky RNG rolls to pressure HP. How to counter: Immobilizing trap zones (Shackles, Spider) or sustain drain (Vampire) can outlast its tempo. |
| Zone Ball Official EN Name: Zone Ball | Tier S | Rare | Arena Trap / Persistent Zone Low Counter Exposure | 9.3 / 10 | 1v1 / 2v2 | Unknown (Unconfirmed) | Generates a persistent red damage zone that continuously drains the HP of any enemy ball inside it. Why it ranks here: One of the best Rare-tier pulls in the game; wide area coverage guarantees hits in the compact square arena. How to counter: Knockback or pull mechanics (Bomb, Harpoon) that force fights outside the active red zone reduce its uptime. |
| Glass Ball Official EN Name: Glass Ball | Tier S | Legendary | Projectile / Turret / Summon Low Counter Exposure | 9.3 / 10 | 1v1 / 2v2 | Unknown (Unconfirmed) | Scatters razor-sharp glass shards on impact, with each individual shard dealing damage to enemies. Why it ranks here: Top-performing Legendary ball; multi-shard scatter excels in enclosed walls and hits multiple targets in 2v2. How to counter: Avoid hugging corners where shard density is highest; sustain balls can absorb scattered chip hits. |
| Dice Ball Official EN Name: Dice Ball | Tier S | Epic | Arena Trap / Persistent Zone Low Counter Exposure | 9.2 / 10 | 1v1 / 2v2 | Unknown (Unconfirmed) | Drops dice across the arena floor that establish a persistent multi-point hazard field. Why it ranks here: Unlike pure RNG balls, Dice Ball blankets the floor with physical hazards that reliably chip opponents. How to counter: High-sustain Vampire Ball or fast initial burst before dice accumulate on the floor. |
| Hive Ball Official EN Name: Hive Ball | Tier A | Legendary | Projectile / Turret / Summon Low Counter Exposure | 8.8 / 10 | 1v1 / 2v2 | Unknown (Unconfirmed) | Releases swarms of homing bees that track down enemy balls and apply poison damage. Why it ranks here: Homing bees bypass aim inaccuracies and guarantee consistent poison application across the arena. How to counter: Fast burst or high lifesteal (Vampire Ball) can out-race the gradual bee + poison damage. |
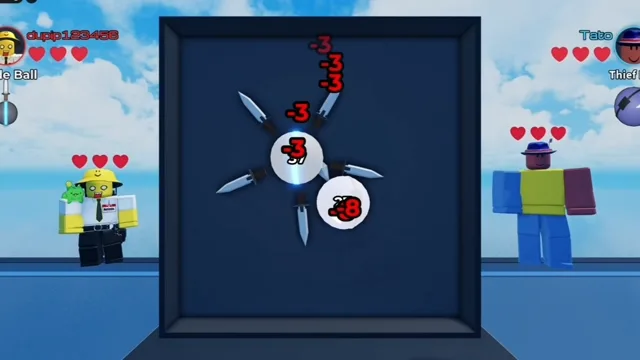
| Thief Ball Official EN Name: Thief Ball | Tier A | Rare | Projectile / Turret / Summon Low Counter Exposure | 8.7 / 10 | 1v1 / 2v2 | Unknown (Unconfirmed) | Throws knives at the nearest enemy ball, with knife throw frequency accelerating as your HP drops. Why it ranks here: Strong comeback mechanic at low HP; auto-targeting knives make it less reliant on direct collision angles. How to counter: High burst traps (Shackles) can eliminate Thief Ball before its low-HP attack speed ramp activates. |
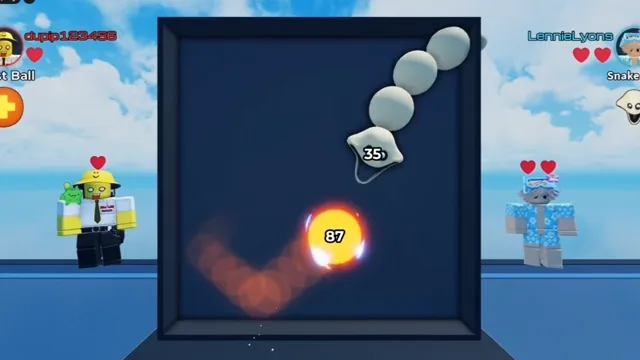
| Snake Ball Official EN Name: Snake Ball | Tier A | Rare | Knockback / Stun / Pull Moderate Counter Exposure | 8.6 / 10 | 1v1 / 2v2 | Unknown (Unconfirmed) | Grows a segmented tail over time that damages enemies and knocks them back on contact. Why it ranks here: Expanding tail hitbox controls space and disrupts latch balls like Vampire Ball. How to counter: Arena floor traps (Laser, Spider, Zone) punish Snake Ball for occupying a larger footprint. |
| Electric Ball Official EN Name: Electric Ball | Tier A | Rare | Knockback / Stun / Pull Low Counter Exposure | 8.6 / 10 | 1v1 / 2v2 | Unknown (Unconfirmed) | Shocks and briefly freezes enemy balls in place upon contact, opening windows for uncontested damage. Why it ranks here: Micro-stuns disrupt momentum-reliant balls (Axe, Spear, Burst) and give teammates free hits in 2v2. How to counter: Passive hazard summoners (Cannon, Hive, Laser) continue dealing damage even while Electric Ball stuns their body. |
| Cannon Ball Official EN Name: Cannon Ball | Tier A | Epic | Projectile / Turret / Summon Low Counter Exposure | 8.6 / 10 | 1v1 / 2v2 | Unknown (Unconfirmed) | Spawns automated turrets after wall impacts that fire projectiles at enemy balls across the arena. Why it ranks here: Wall-bounce turret setup lets you deal remote damage without needing direct ball-to-ball collisions. How to counter: Lockdown balls (Shackles) that stop Cannon Ball from reaching walls prevent turret spawning. |
| Ice Cone Ball Official EN Name: Ice Cone Ball | Tier A | Epic | Projectile / Turret / Summon Low Counter Exposure | 8.5 / 10 | 1v1 / 2v2 | Unknown (Unconfirmed) | Drops bombs that detonate into icy spikes, blanketing a wide area with burst and hazard damage. Why it ranks here: Wide AoE spike burst makes it hard to dodge in cramped 2v2 arenas and punishes slow balls. How to counter: Fast trajectory balls or lifesteal sustain can out-trade the cooldown between bomb drops. |
| Bomb Ball Official EN Name: Bomb Ball | Tier A | Epic | Knockback / Stun / Pull Moderate Counter Exposure | 8.4 / 10 | 1v1 / 2v2 | Unknown (Unconfirmed) | Triggers explosive blasts that deal solid damage and knock the opponent off their trajectory. Why it ranks here: Strong Epic-tier disruptor; knockback breaks enemy positioning and ruins precision aiming. How to counter: Be careful against Laser or Spider Ball, where knocking the enemy into walls can trigger more wall hazards. |
| Harpoon Ball Official EN Name: Harpoon Ball | Tier A | Legendary | Knockback / Stun / Pull Moderate Counter Exposure | 8.4 / 10 | 1v1 / 2v2 | Unknown (Unconfirmed) | Fires a harpoon tether that yanks enemy balls into unfavorable positions and interrupts their pathing. Why it ranks here: Superior version of Hook mechanics with Legendary stats; great in 2v2 for pulling enemies into teammate hazards. How to counter: Pulling a Vampire Ball or Shackles Ball directly onto yourself can backfire in 1v1. |
| Virus Ball Official EN Name: Virus Ball | Tier A | Rare | RNG / Conditional Position Moderate Counter Exposure | 8.3 / 10 | 1v1 / 2v2 | Unknown (Unconfirmed) | Infects enemy balls with poison on contact, dealing damage over time between collisions. Why it ranks here: Consistent DoT pressure even when balls bounce away from each other after initial contact. How to counter: Vampire and Apple Ball healing offsets poison ticks; ranged hazards avoid frequent contact. |
| Range Ball Official EN Name: Range Ball | Tier B | Rare | Arena Trap / Persistent Zone Moderate Counter Exposure | 7.7 / 10 | 1v1 / 2v2 | Unknown (Unconfirmed) | Creates an expanding damage field around itself that hurts nearby enemy balls without needing wall contact. Why it ranks here: Very consistent mid-tier option because it does not depend on wall bounces, though its AoE radius is limited. How to counter: Zone Ball and Laser Ball cover a much larger share of the arena and out-DPS Range Ball. |
| Beam Ball Official EN Name: Beam Ball | Tier B | Legendary | Projectile / Turret / Summon Moderate Counter Exposure | 7.6 / 10 | 1v1 / 2v2 | Unknown (Unconfirmed) | Charges energy and fires a tracking beam toward the opposing ball. Why it ranks here: Tracking beam guarantees ranged poke, but long charge intervals keep it below S-tier Laser Ball. How to counter: Knockback or stun during its charge window disrupts its DPS rhythm. |
| Axe Ball Official EN Name: Axe Ball | Tier B | Unknown (Unconfirmed) | Hit Scaling / Speed Tempo Moderate Counter Exposure | 7.5 / 10 | 1v1 | Unknown (Unconfirmed) | Spins an axe blade to strike enemies on contact and gains movement speed when at low HP. Why it ranks here: Aggressive melee brawler at low HP, but requires direct collisions and struggles against root/web traps. How to counter: Root traps (Shackles, Spider) or stun (Electric) nullify its low-HP speed boost. |
| Apple Ball Official EN Name: Apple Ball | Tier B | Epic | HP Drain / Sustain Moderate Counter Exposure | 7.5 / 10 | 1v1 / 2v2 | Unknown (Unconfirmed) | Throws apples across the arena that provide both healing and enemy damage. Why it ranks here: Hybrid sustain and projectile support; useful in 2v2, though Vampire Ball offers stronger direct 1v1 drain. How to counter: High burst damage (Shackles, Glass) outpaces Apple Ball’s moderate healing output. |
| Frost Ball Official EN Name: Frost Ball | Tier B | Rare | Arena Trap / Persistent Zone Moderate Counter Exposure | 7.5 / 10 | 2v2 | Unknown (Unconfirmed) | Leaves a trail of frost across the arena that freezes and damages enemies passing through. Why it ranks here: Valuable utility freeze in 2v2 team matches, but lacks the raw solo damage to finish 1v1 duels quickly. How to counter: Ranged turret/shard balls (Cannon, Glass, Hive) keep attacking even when slowed or frozen. |
| Blade Ball Official EN Name: Blade Ball | Tier B | Rare | Hit Scaling / Speed Tempo Moderate Counter Exposure | 7.5 / 10 | 1v1 | Unknown (Unconfirmed) | Accumulates orbiting blades over the course of a round, progressively widening its attack hitbox. Why it ranks here: Weak in the first few seconds of a round, but dangerous in drawn-out exchanges once blades stack up. How to counter: End the round early with high initial burst (Shackles, Glass) before Blade Ball scales. |
| Big Spike Ball Official EN Name: Big Spike Ball | Tier B | Rare | Arena Trap / Persistent Zone Moderate Counter Exposure | 7.4 / 10 | 1v1 | Unknown (Unconfirmed) | Deploys spikes along arena walls that damage enemy balls when they bounce into them. Why it ranks here: Solid starter wall-hazard ball, though outclassed by Laser Ball and Spider Ball which cover the center too. How to counter: Center-zone controllers (Zone Ball, Range Ball) deal damage without relying on contested wall segments. |
| Reforge Ball Official EN Name: Reforge Ball | Tier B | Rare | Hit Scaling / Speed Tempo Moderate Counter Exposure | 7.4 / 10 | 1v1 | Unknown (Unconfirmed) | Summons a companion helper that grows progressively stronger with every arena wall hit. Why it ranks here: Strong late-round scaling if allowed to bounce freely off walls. How to counter: Root traps (Shackles) and stuns (Electric) prevent wall bounces and starve its helper scaling. |
| Poison Spike Ball Official EN Name: Poison Spike Ball | Tier B | Unknown (Unconfirmed) | Arena Trap / Persistent Zone Moderate Counter Exposure | 7.4 / 10 | 1v1 / 2v2 | Unknown (Unconfirmed) | Plants wall spikes that both damage and poison enemy balls upon wall contact. Why it ranks here: Upgrades standard wall spikes with poison DoT, but still relies on the enemy bouncing into spiked wall sections. How to counter: Center-arena zones (Zone Ball) or sustain (Vampire Ball) reduce the impact of wall-only traps. |
| Bow Ball Official EN Name: Bow Ball | Tier B | Rare | Projectile / Turret / Summon Moderate Counter Exposure | 7.3 / 10 | 1v1 / 2v2 | Unknown (Unconfirmed) | Charges up and fires arrows that bounce off arena walls to hit enemies. Why it ranks here: Ricocheting arrows can hit from unexpected angles, though charge time lowers overall DPS consistency. How to counter: High-tempo balls (Conductor, Vampire) overwhelm Bow Ball between arrow charge cycles. |
| Cactus Ball Official EN Name: Cactus Ball | Tier B | Epic | Projectile / Turret / Summon Moderate Counter Exposure | 7.3 / 10 | 2v2 | Unknown (Unconfirmed) | Throws bouncing cacti across the arena that deal AoE contact damage. Why it ranks here: Decent area coverage in 2v2, though less accurate than Glass Ball shards or Ice Cone spikes. How to counter: Persistent floor zones (Laser, Zone, Dice) deal much more reliable damage than bouncing cacti. |
| Hook Ball Official EN Name: Hook Ball | Tier B | Rare | Knockback / Stun / Pull High Counter Exposure | 7.2 / 10 | 2v2 | Unknown (Unconfirmed) | Hooks an enemy ball and forces it to lose control of its movement trajectory. Why it ranks here: Disrupts movement-dependent enemies, but heavily countered by Spider Ball and other web/trap layers. How to counter: Pick Spider Ball, Shackles Ball, or Vampire Ball—hooking them closer only accelerates your own HP loss. |
| Electro King Official EN Name: Electro King | Tier B | Rare | RNG / Conditional Position Moderate Counter Exposure | 7.1 / 10 | 1v1 / 2v2 | Unknown (Unconfirmed) | Rare-tier electric variant with situational shock triggers that trail behind Conductor and Electric Ball. Why it ranks here: Serviceable early-collection filler when neither Conductor nor Electric Ball rolls in your 3-ball draft. How to counter: Out-traded by S-tier hazard zones and sustain balls. |
| Fibonacci Ball Official EN Name: Fibonacci Ball | Tier B | Epic | Hit Scaling / Speed Tempo High Counter Exposure | 7.1 / 10 | 1v1 | Unknown (Unconfirmed) | Scales damage along a mathematical sequence on consecutive hits, requiring roughly 10+ hits to peak. Why it ranks here: Massive theoretical damage ceiling, but most competitive rounds end before it lands 10 hits. How to counter: Keep distance with traps or turrets so Fibonacci Ball cannot chain 10 rapid collisions. |
| Burst Ball Official EN Name: Burst Ball | Tier B | Rare | Hit Scaling / Speed Tempo High Counter Exposure | 7 / 10 | 1v1 | Unknown (Unconfirmed) | Delivers conditional high damage bursts when dashing into the enemy at the right timing window. Why it ranks here: High ceiling when dashes align, but inconsistent timing keeps it in B-Tier. How to counter: Dashing into Spider webs, Laser grids, or Shackles traps punishes Burst Ball heavily. |
| Spear Ball Official EN Name: Spear Ball | Tier B | Epic | Hit Scaling / Speed Tempo High Counter Exposure | 7 / 10 | 1v1 | Unknown (Unconfirmed) | Executes a forward spear charge that inflicts damage and knockback along a narrow line. Why it ranks here: Strong knockback hit when aligned, but held back by a very narrow spear hitbox that often whiffs. How to counter: Wide AoE zones (Zone, Spider, Ice Cone) punish Spear Ball regardless of where its narrow tip points. |
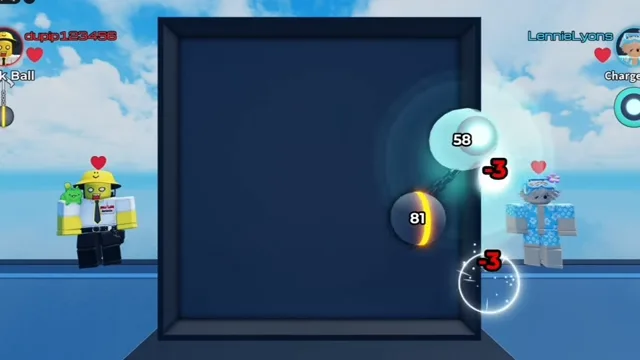
| Charge Ball Official EN Name: Charge Ball | Tier C | Rare | RNG / Conditional Position High Counter Exposure | 6.2 / 10 | 1v1 | Unknown (Unconfirmed) | Stores power the longer it waits between hits to empower its next collision. Why it ranks here: Sits at the top of C-Tier; hits hard when charged, but compact arena chaos rarely lets it wait undisturbed. How to counter: Frequent multi-hit balls (Spider, Laser, Hive) constantly interrupt or out-trade its slow single hits. |
| Chess Ball Official EN Name: Chess Ball | Tier C | Legendary | RNG / Conditional Position High Counter Exposure | 5.6 / 10 | 1v1 | Unknown (Unconfirmed) | Dashes to the center of the arena and attacks strictly along fixed chess-piece movement lines. Why it ranks here: Prime example of why Legendary rarity != S-tier: rigid chess-line attacks miss moving targets constantly. How to counter: Place a Zone Ball or Spider web in the center where Chess Ball repeatedly dashes. |
| WDC Ball Official EN Name: WDC Ball | Tier C | Epic | RNG / Conditional Position High Counter Exposure | 5.5 / 10 | 1v1 | Unknown (Unconfirmed) | Damage output is determined by the numbered cell it lands on, making performance purely luck-based. Why it ranks here: Can high-roll occasional big hits, but too erratic to spend your 1 free match pick on. How to counter: Any consistent S/A-tier ball beats WDC Ball on average over a 3-heart match. |
| Cell Ball Official EN Name: Cell Ball | Tier C | Rare | RNG / Conditional Position High Counter Exposure | 5.4 / 10 | 2v2 | Unknown (Unconfirmed) | Grows in size over time and splits into smaller balls when destroyed, but usually dies before reaching full growth. Why it ranks here: Interesting split gimmick, yet high-damage meta balls destroy it before the growth threshold matters. How to counter: Aggressive burst or hazard zones (Shackles, Laser, Glass) eliminate Cell Ball rapidly. |
| Verity Ball Official EN Name: Verity Ball | Tier C | Legendary | RNG / Conditional Position High Counter Exposure | 5.3 / 10 | 1v1 | Unknown (Unconfirmed) | Has a random chance to level up and gain strength whenever it takes damage from the opponent. Why it ranks here: Legendary rarity trap: requires losing HP AND hitting lucky level-up rolls; melts against burst damage. How to counter: High burst balls (Shackles, Glass, Conductor) eliminate Verity Ball before lucky level-ups can stack. |
| Potion Ball Official EN Name: Potion Ball | Tier C | Legendary | RNG / Conditional Position Unknown / Unconfirmed | — | Unknown / Unconfirmed | Unknown (Unconfirmed) | Throws random potions that leave effect zones in the arena. Why it ranks here: The community guide ranks it C because the random potion effect may help or contribute little. No numerical consistency score is available. How to counter: The source does not provide named counters or tested mode comparisons. Check the active effect zones rather than assuming every potion behaves alike. |
| Acid Ball Official EN Name: Acid Ball | Tier C | Rare | Arena Trap / Persistent Zone Unknown / Unconfirmed | — | Unknown / Unconfirmed | Unknown (Unconfirmed) | Spits poisonous acid puddles that leave lingering damage zones. Why it ranks here: The community guide reports lingering damage but random puddle placement, so an enemy may avoid the affected area. Its C tier is an author opinion. How to counter: No named counter matchup or fixed damage number was verified. Area coverage depends on where the puddle appears. |
| Machine Gun Ball Official EN Name: Machine Gun Ball | Tier C | Rare | Projectile / Turret / Summon Unknown / Unconfirmed | — | Unknown / Unconfirmed | Unknown (Unconfirmed) | Shoots the closest enemy. The official draft-card capture shows this ability text. Why it ranks here: Nearest-target fire is straightforward, but the community guide ranks it C due to low damage per shot. No fixed shot-damage value is verified. How to counter: The source does not establish specific counters or whether this is a preferred 1v1/2v2 pick. Keep those comparisons unconfirmed. |
| Ray Ball Official EN Name: Ray Ball | Tier C | Rare | Projectile / Turret / Summon Unknown / Unconfirmed | — | 2v2 | Unknown (Unconfirmed) | Hitting arena walls spawns laser turrets. Why it ranks here: The community guide ranks it C because turret hits are inconsistent, and suggests 2v2 can offer better opportunities. This mode preference is reported, not tested here. How to counter: No named counter relationships or exact turret damage were verified; this entry does not inherit Laser Ball’s stronger ranking. |